Quick Start
What is LangChain Hub?
LangChain Hub lets you discover, share, and version control prompts for LangChain and LLMs in general.
It's a great place to find inspiration for your own prompts, or to share your own prompts with the world!
Currently, it supports LangChain prompt templates, and more object types are coming soon.
Some hub features can be used without logging in here! However, creating and modifying prompts requires a non-waitlisted account.
The steps in this guide will acquaint you with LangChain Hub:
- Browse the hub for a prompt of interest
- Try out a prompt in the playground
- Log in and set a handle
- Modify the prompt in the playground and commit it back to the hub
1. Browse the hub for a prompt of interest
You can access the public view of the hub directly at https://smith.langchain.com/hub.
From this screen, you can browse prompts that others have published.
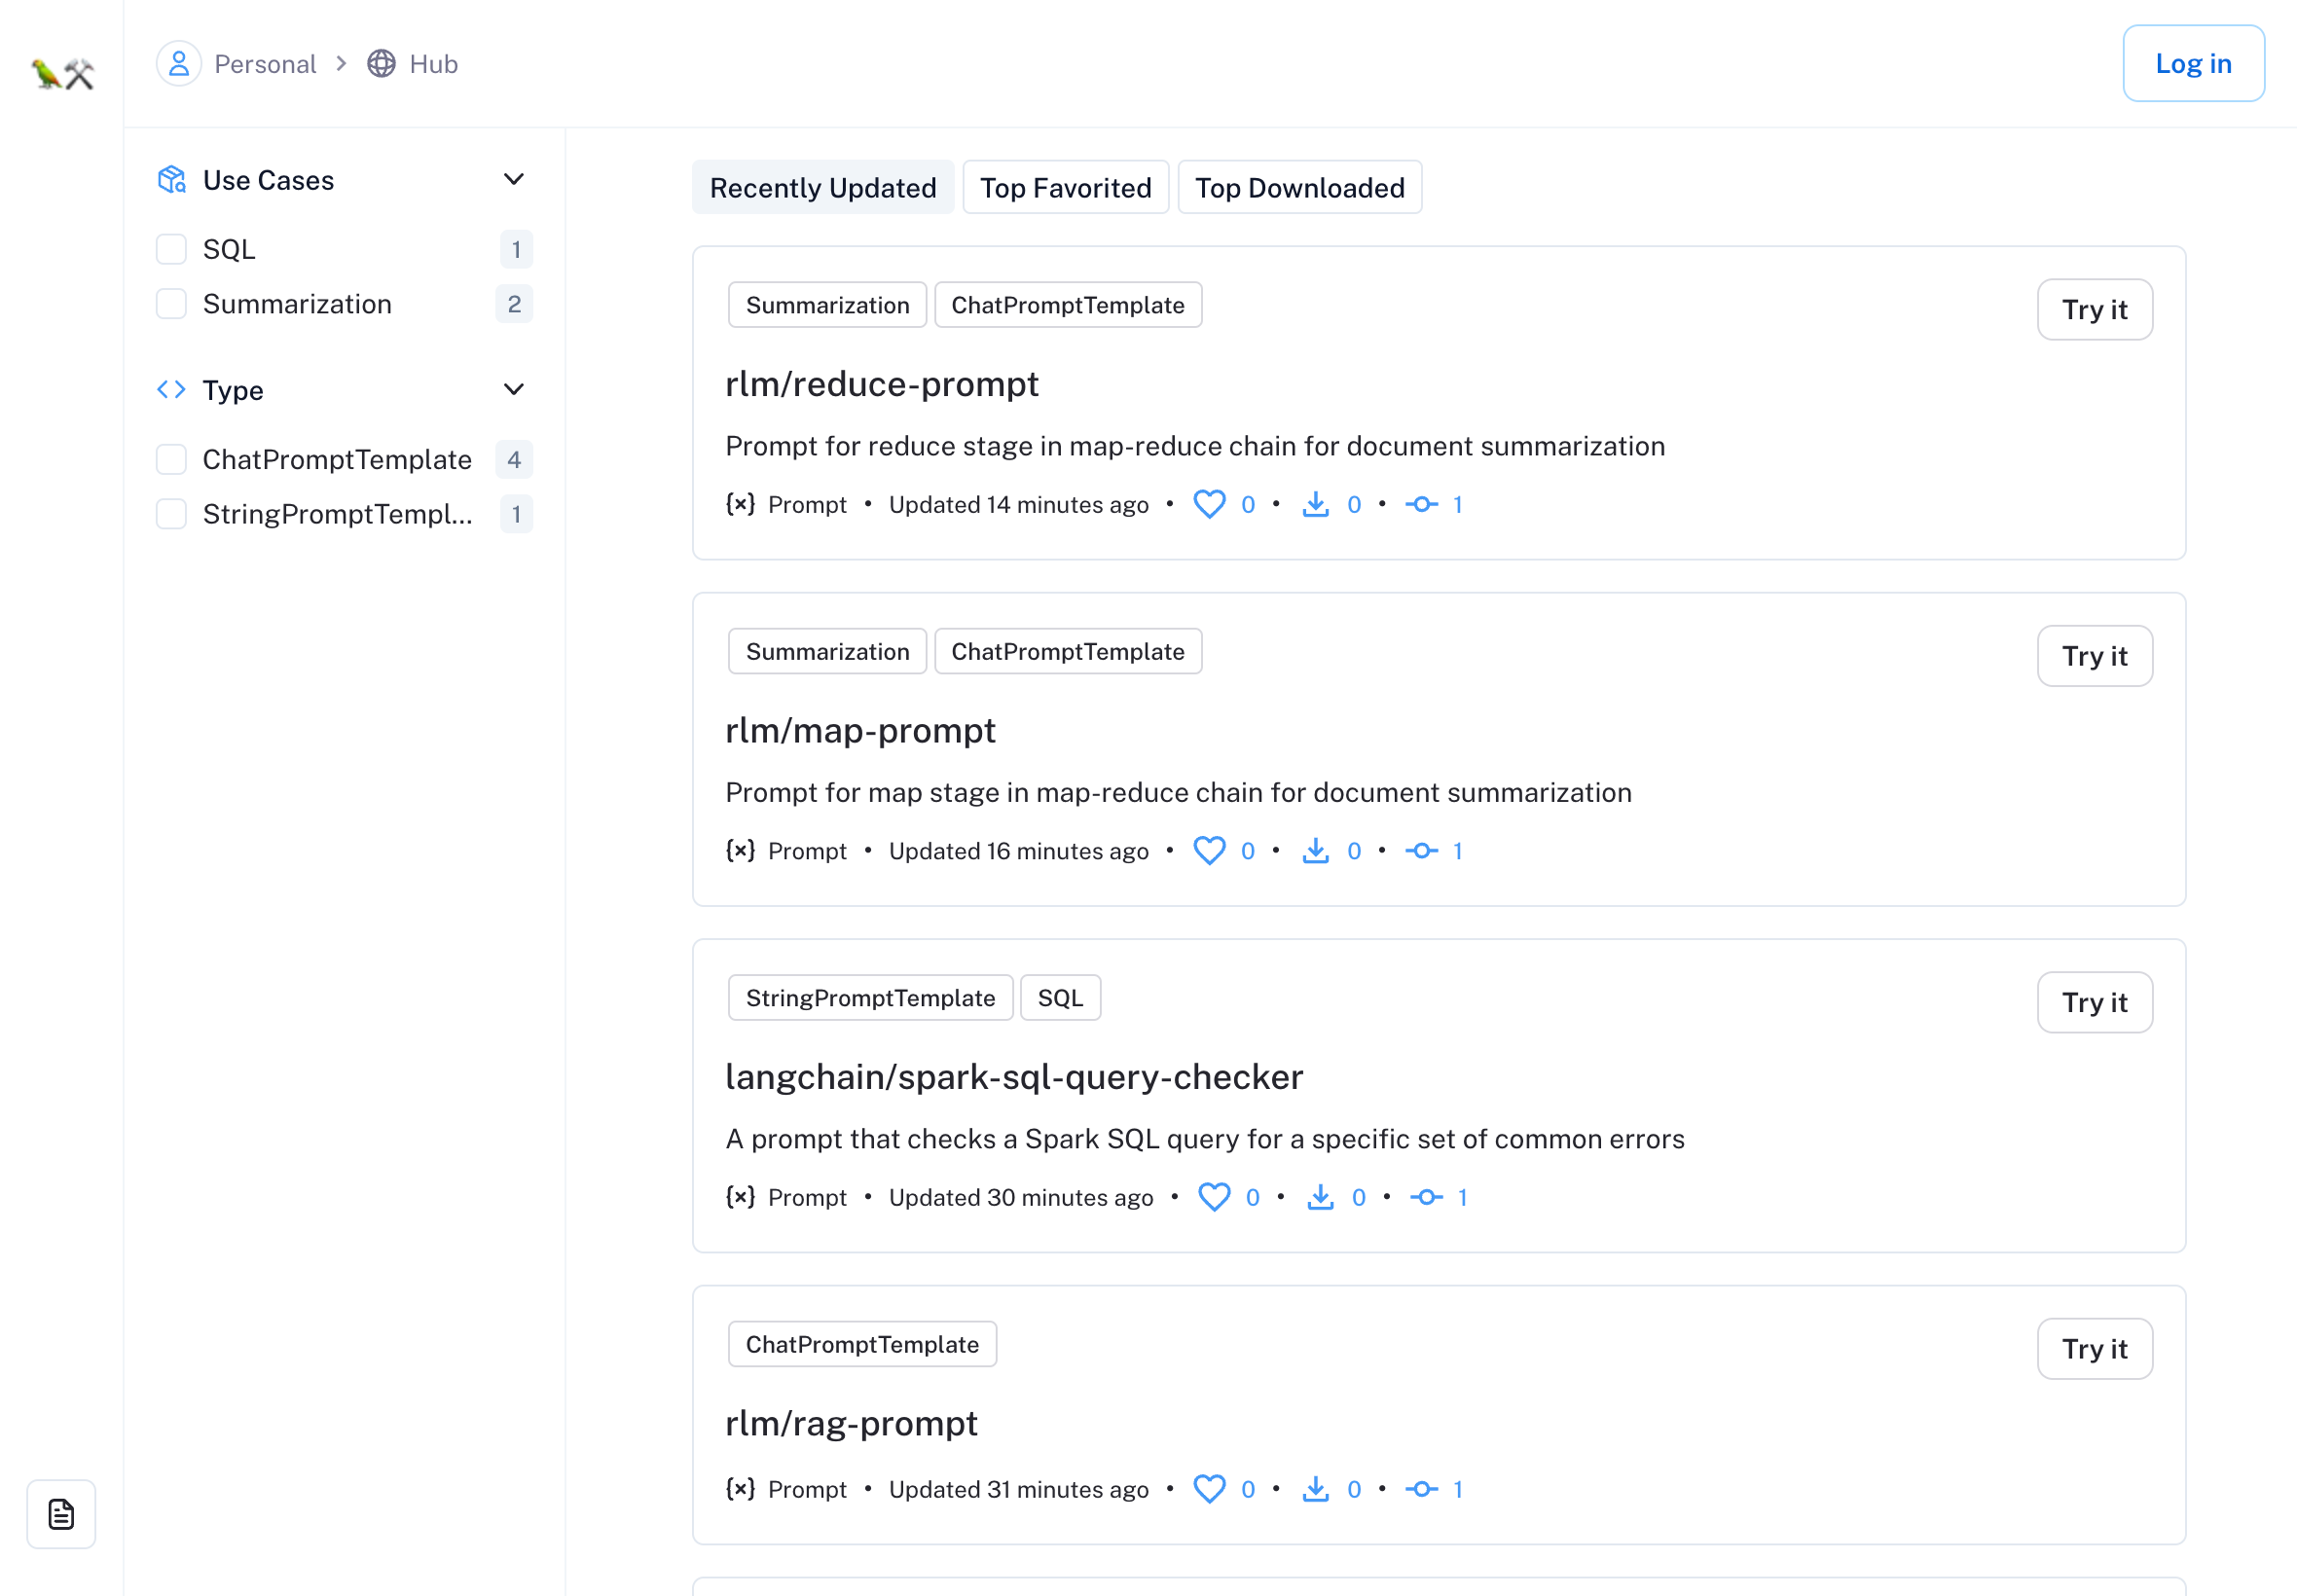
On the left side, you can filter by different tags, such as types of prompts (Chat vs. Regular), use cases, or models they're designed to be used with (llama-2 vs. gpt-4).
If you see a prompt that looks interesting, you can either click into its page, or you can jump straight to using it in the playground with the "Try it" button.
2. Try out a prompt in the playground
For this example, we'll use the following prompt: https://smith.langchain.com/hub/langchain/my-first-prompt
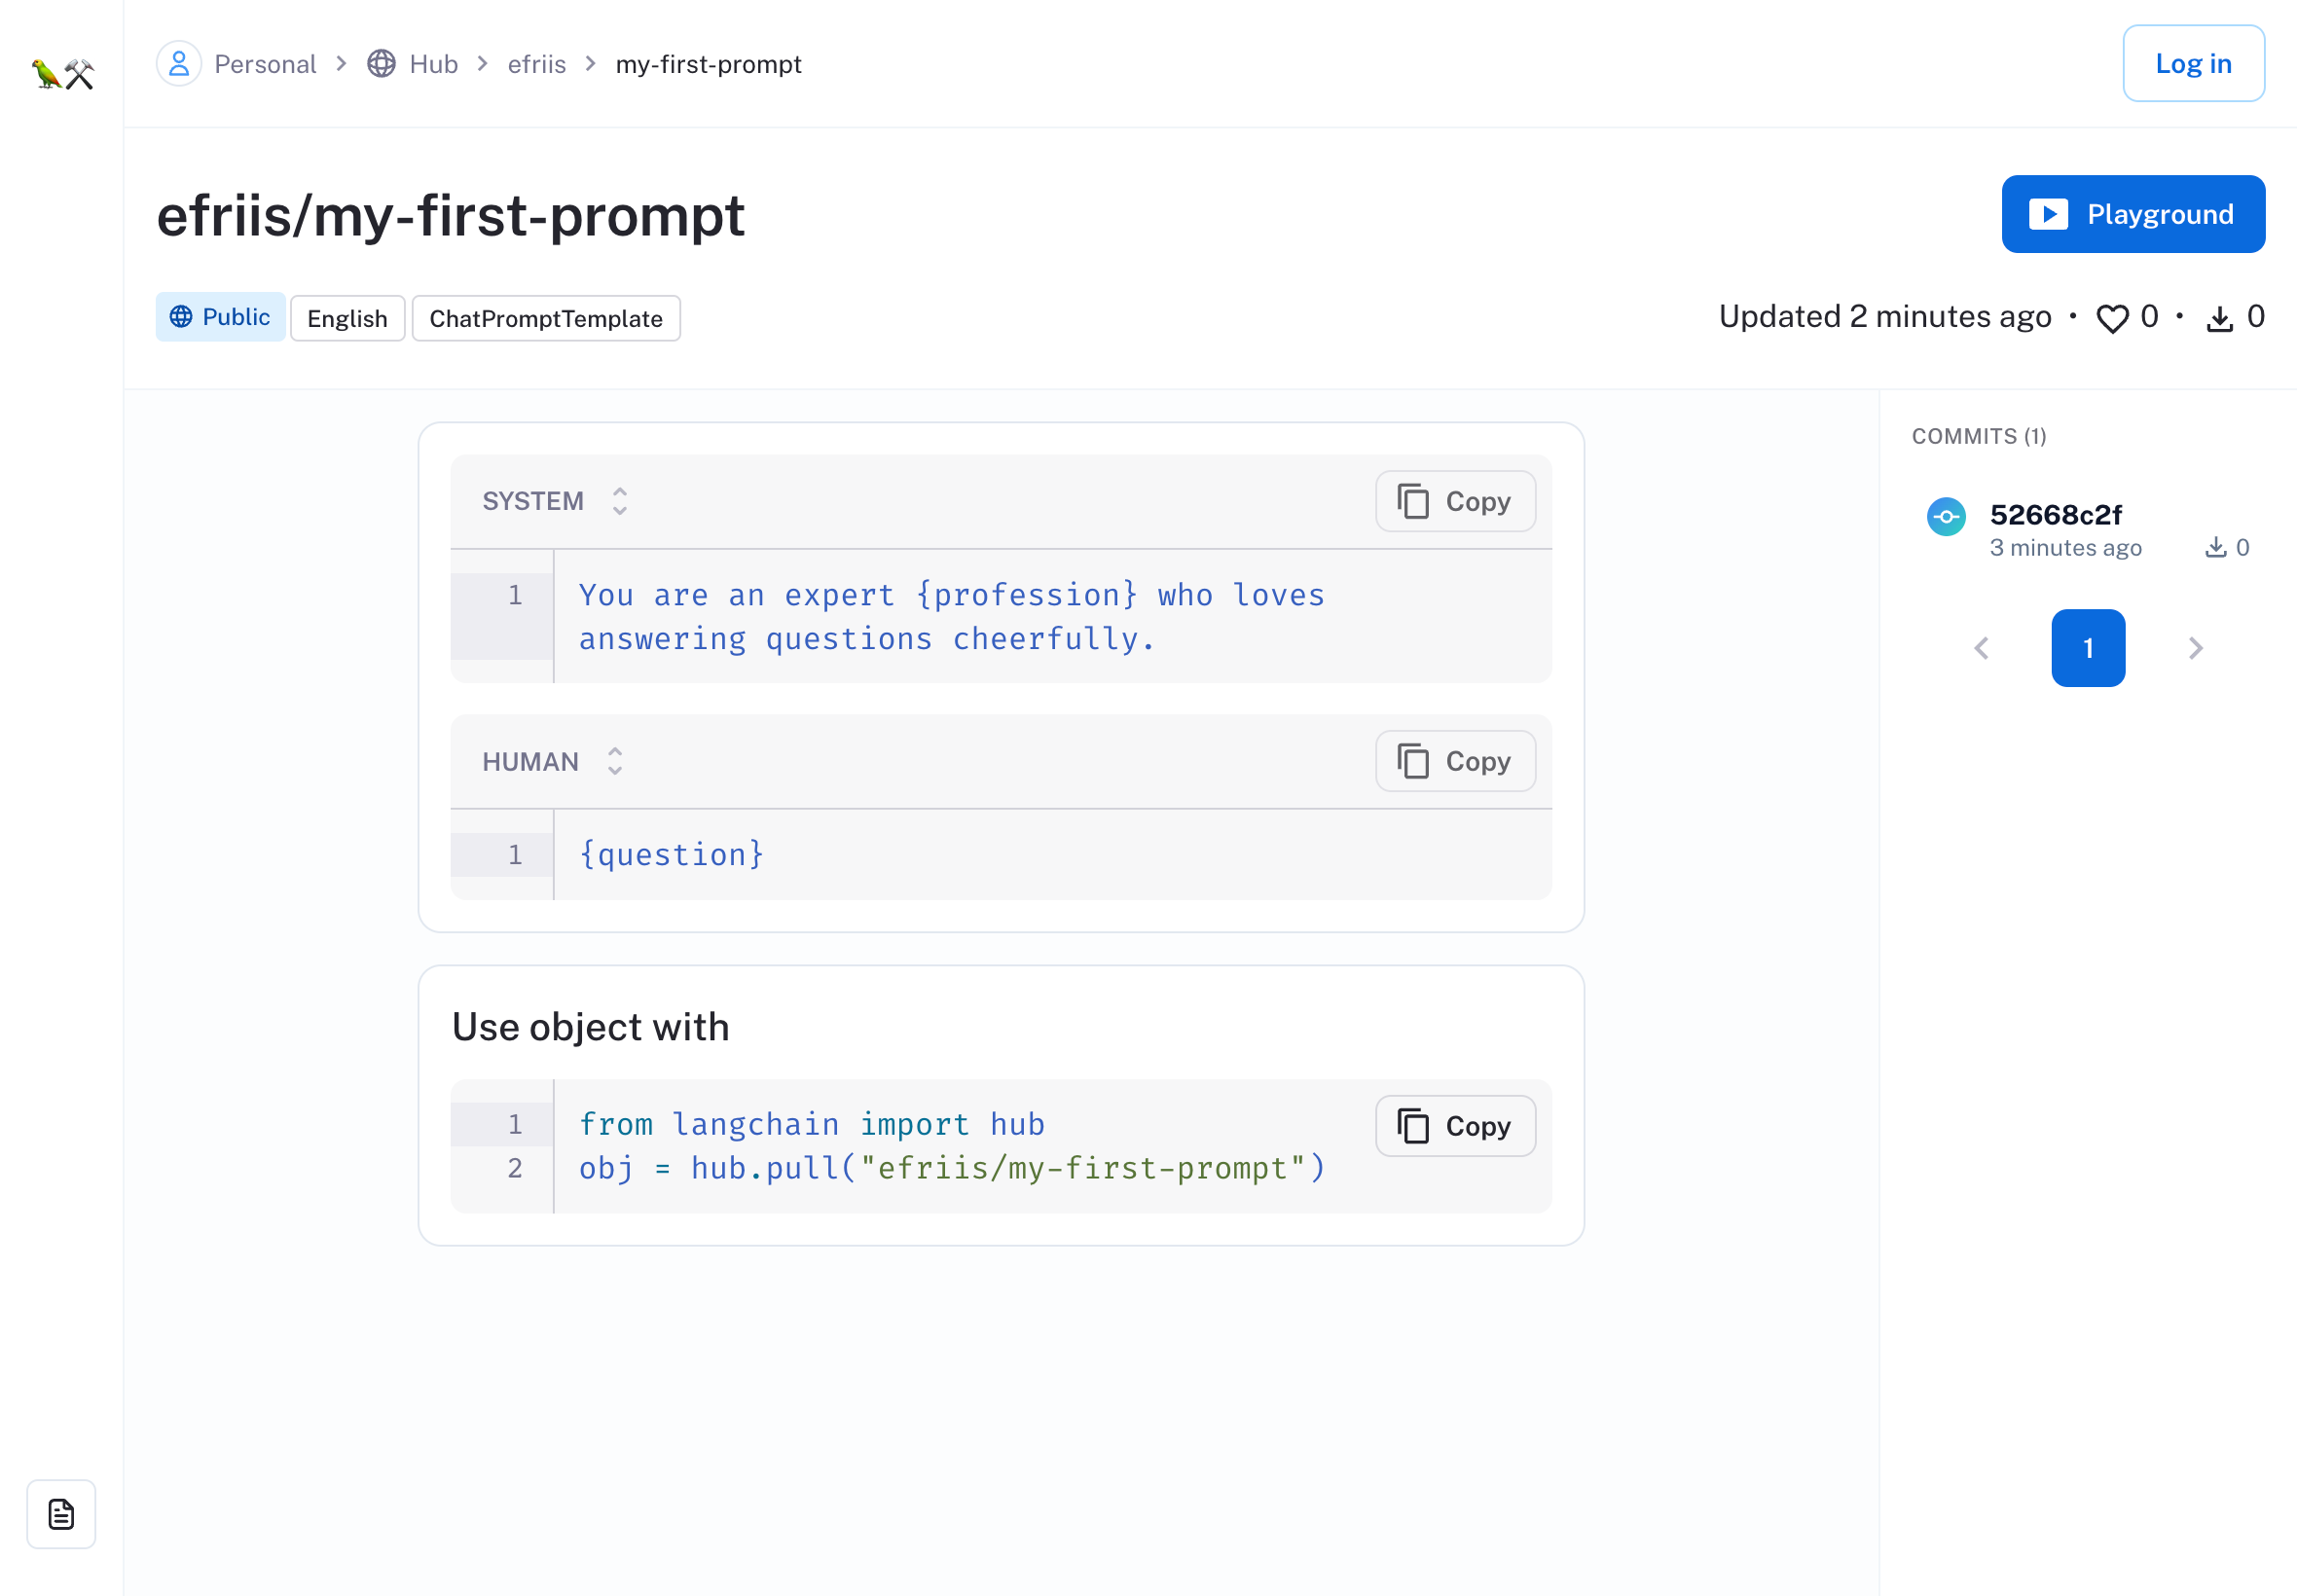
To start, you can get a sense of what the prompt does just by looking at it (this one is pretty straightforward). Below the contents of the prompt, you can see a code snippet of how to use it in Python. For more information on using hub prompts from code, finish this guide and check out the developer guide.
Next, let's try out the object in the playground by clicking the playground button in the top-right.
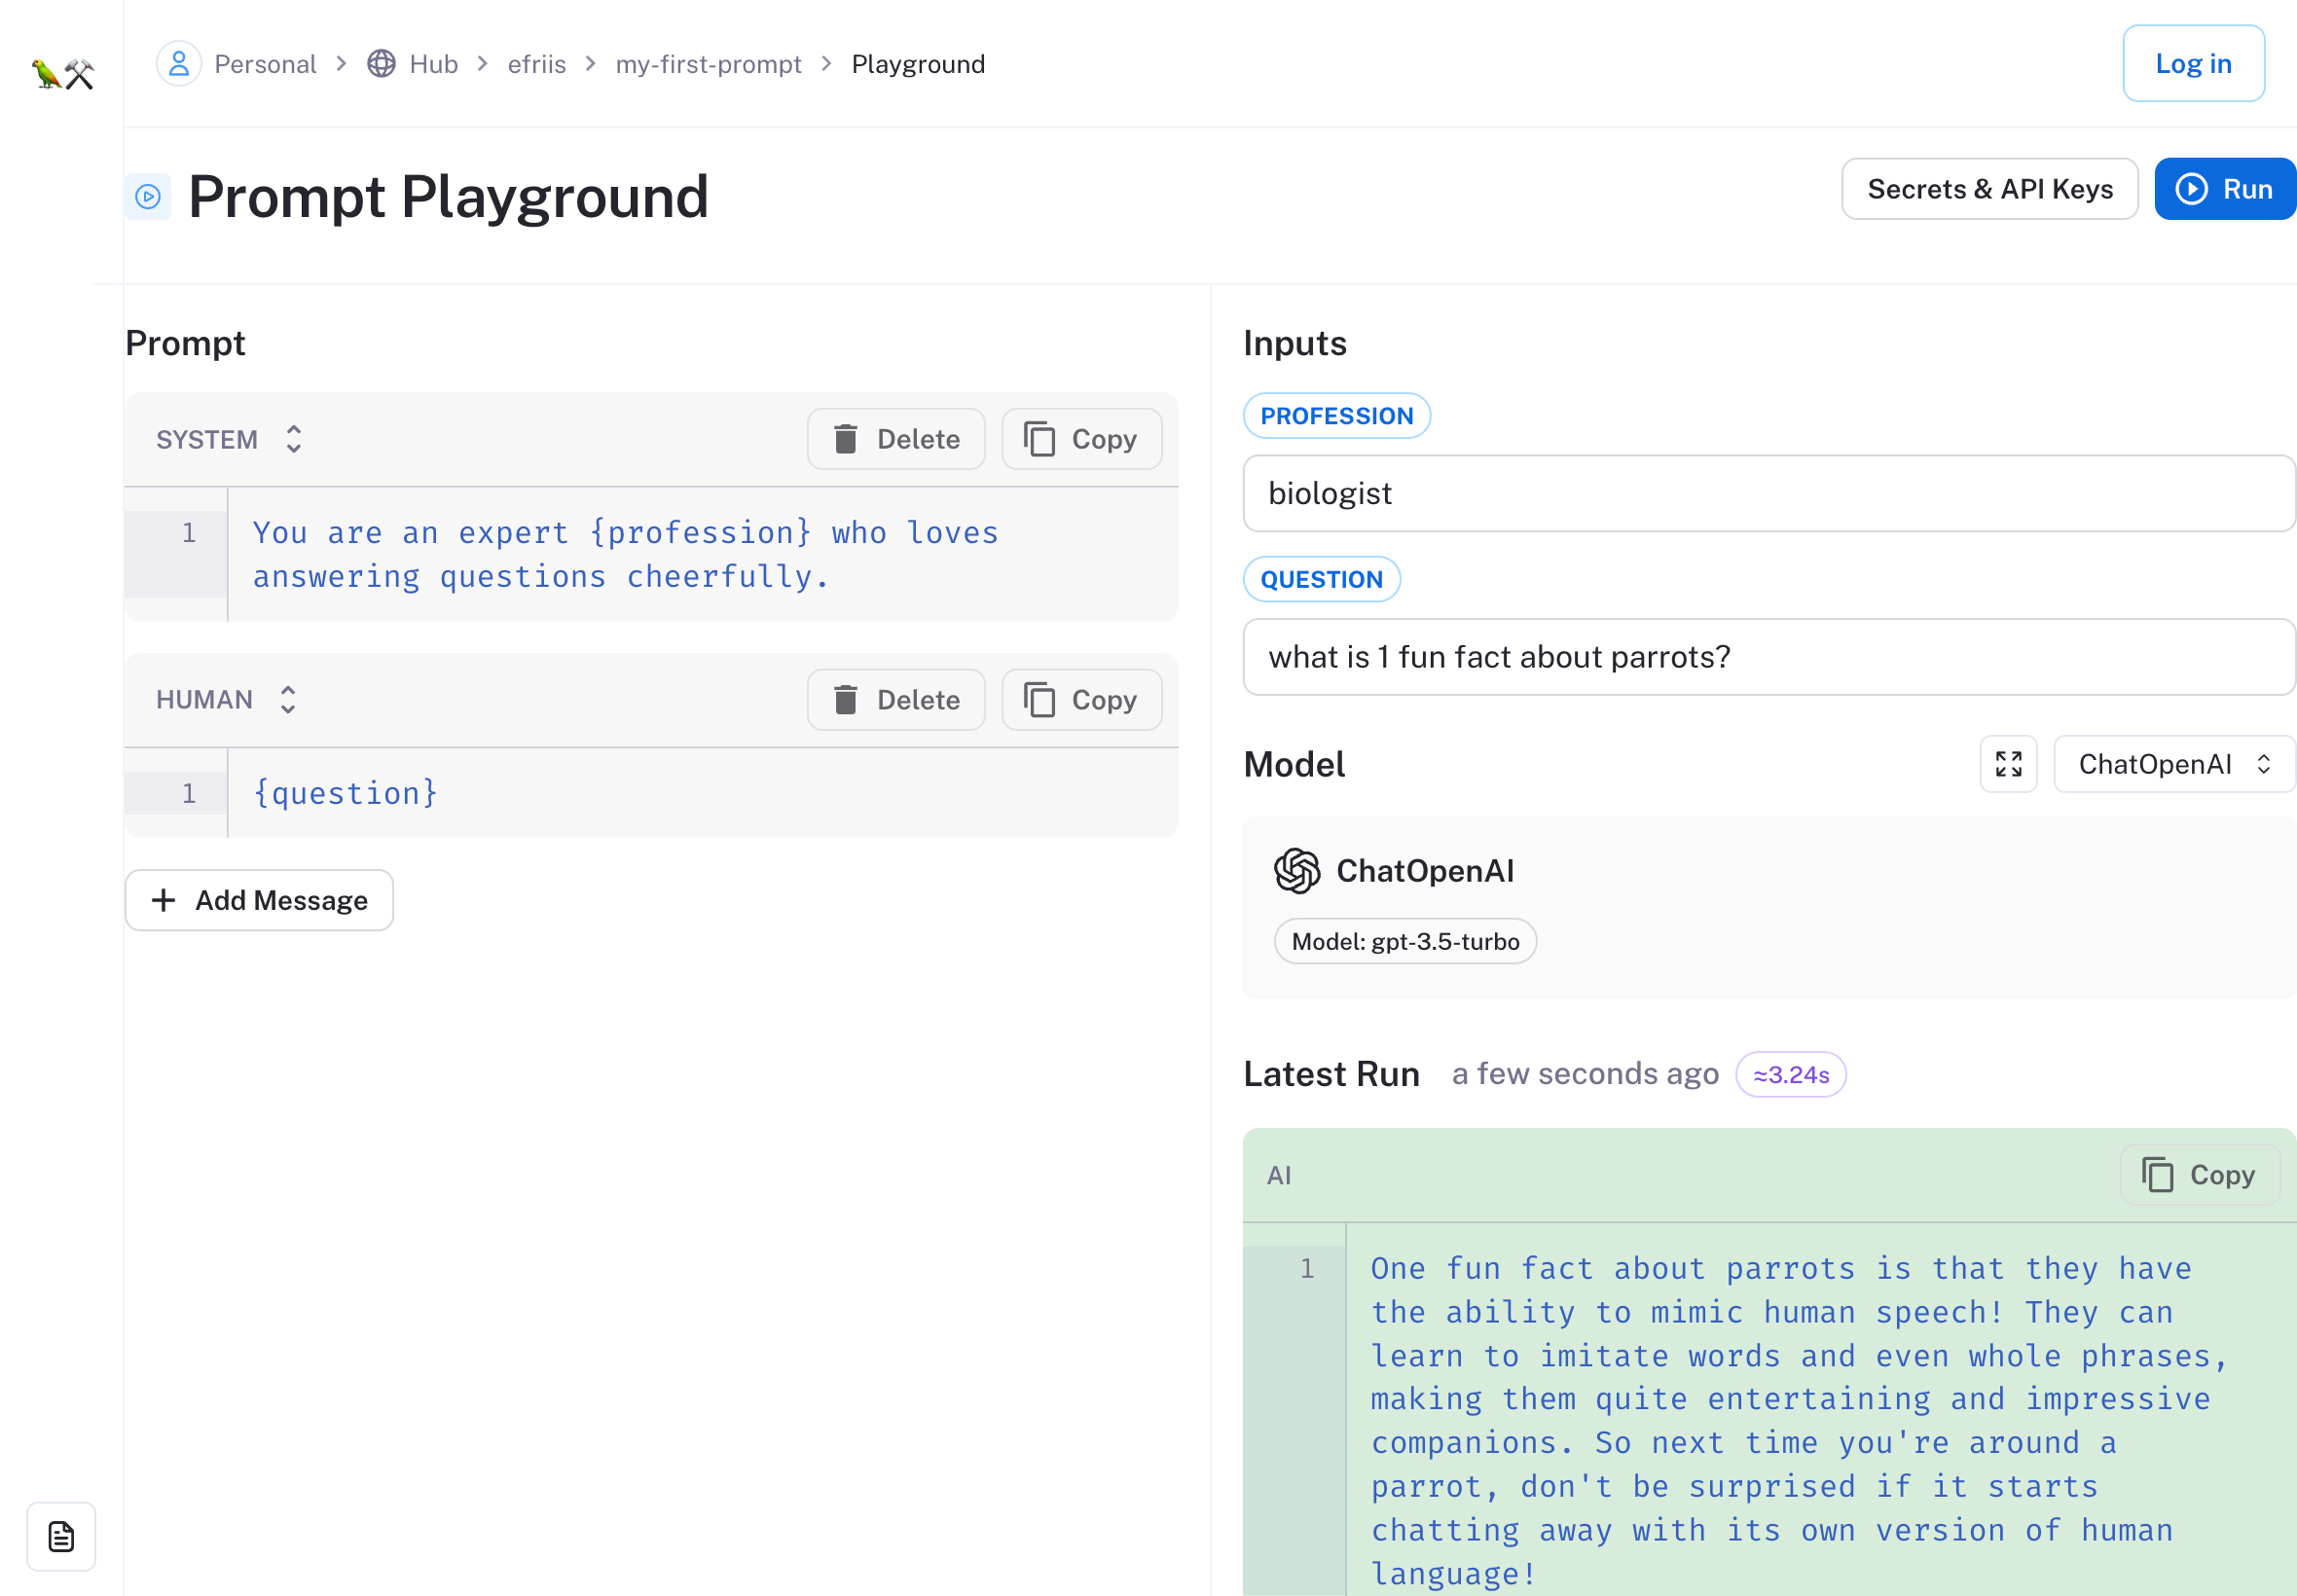
The playground should look like this:
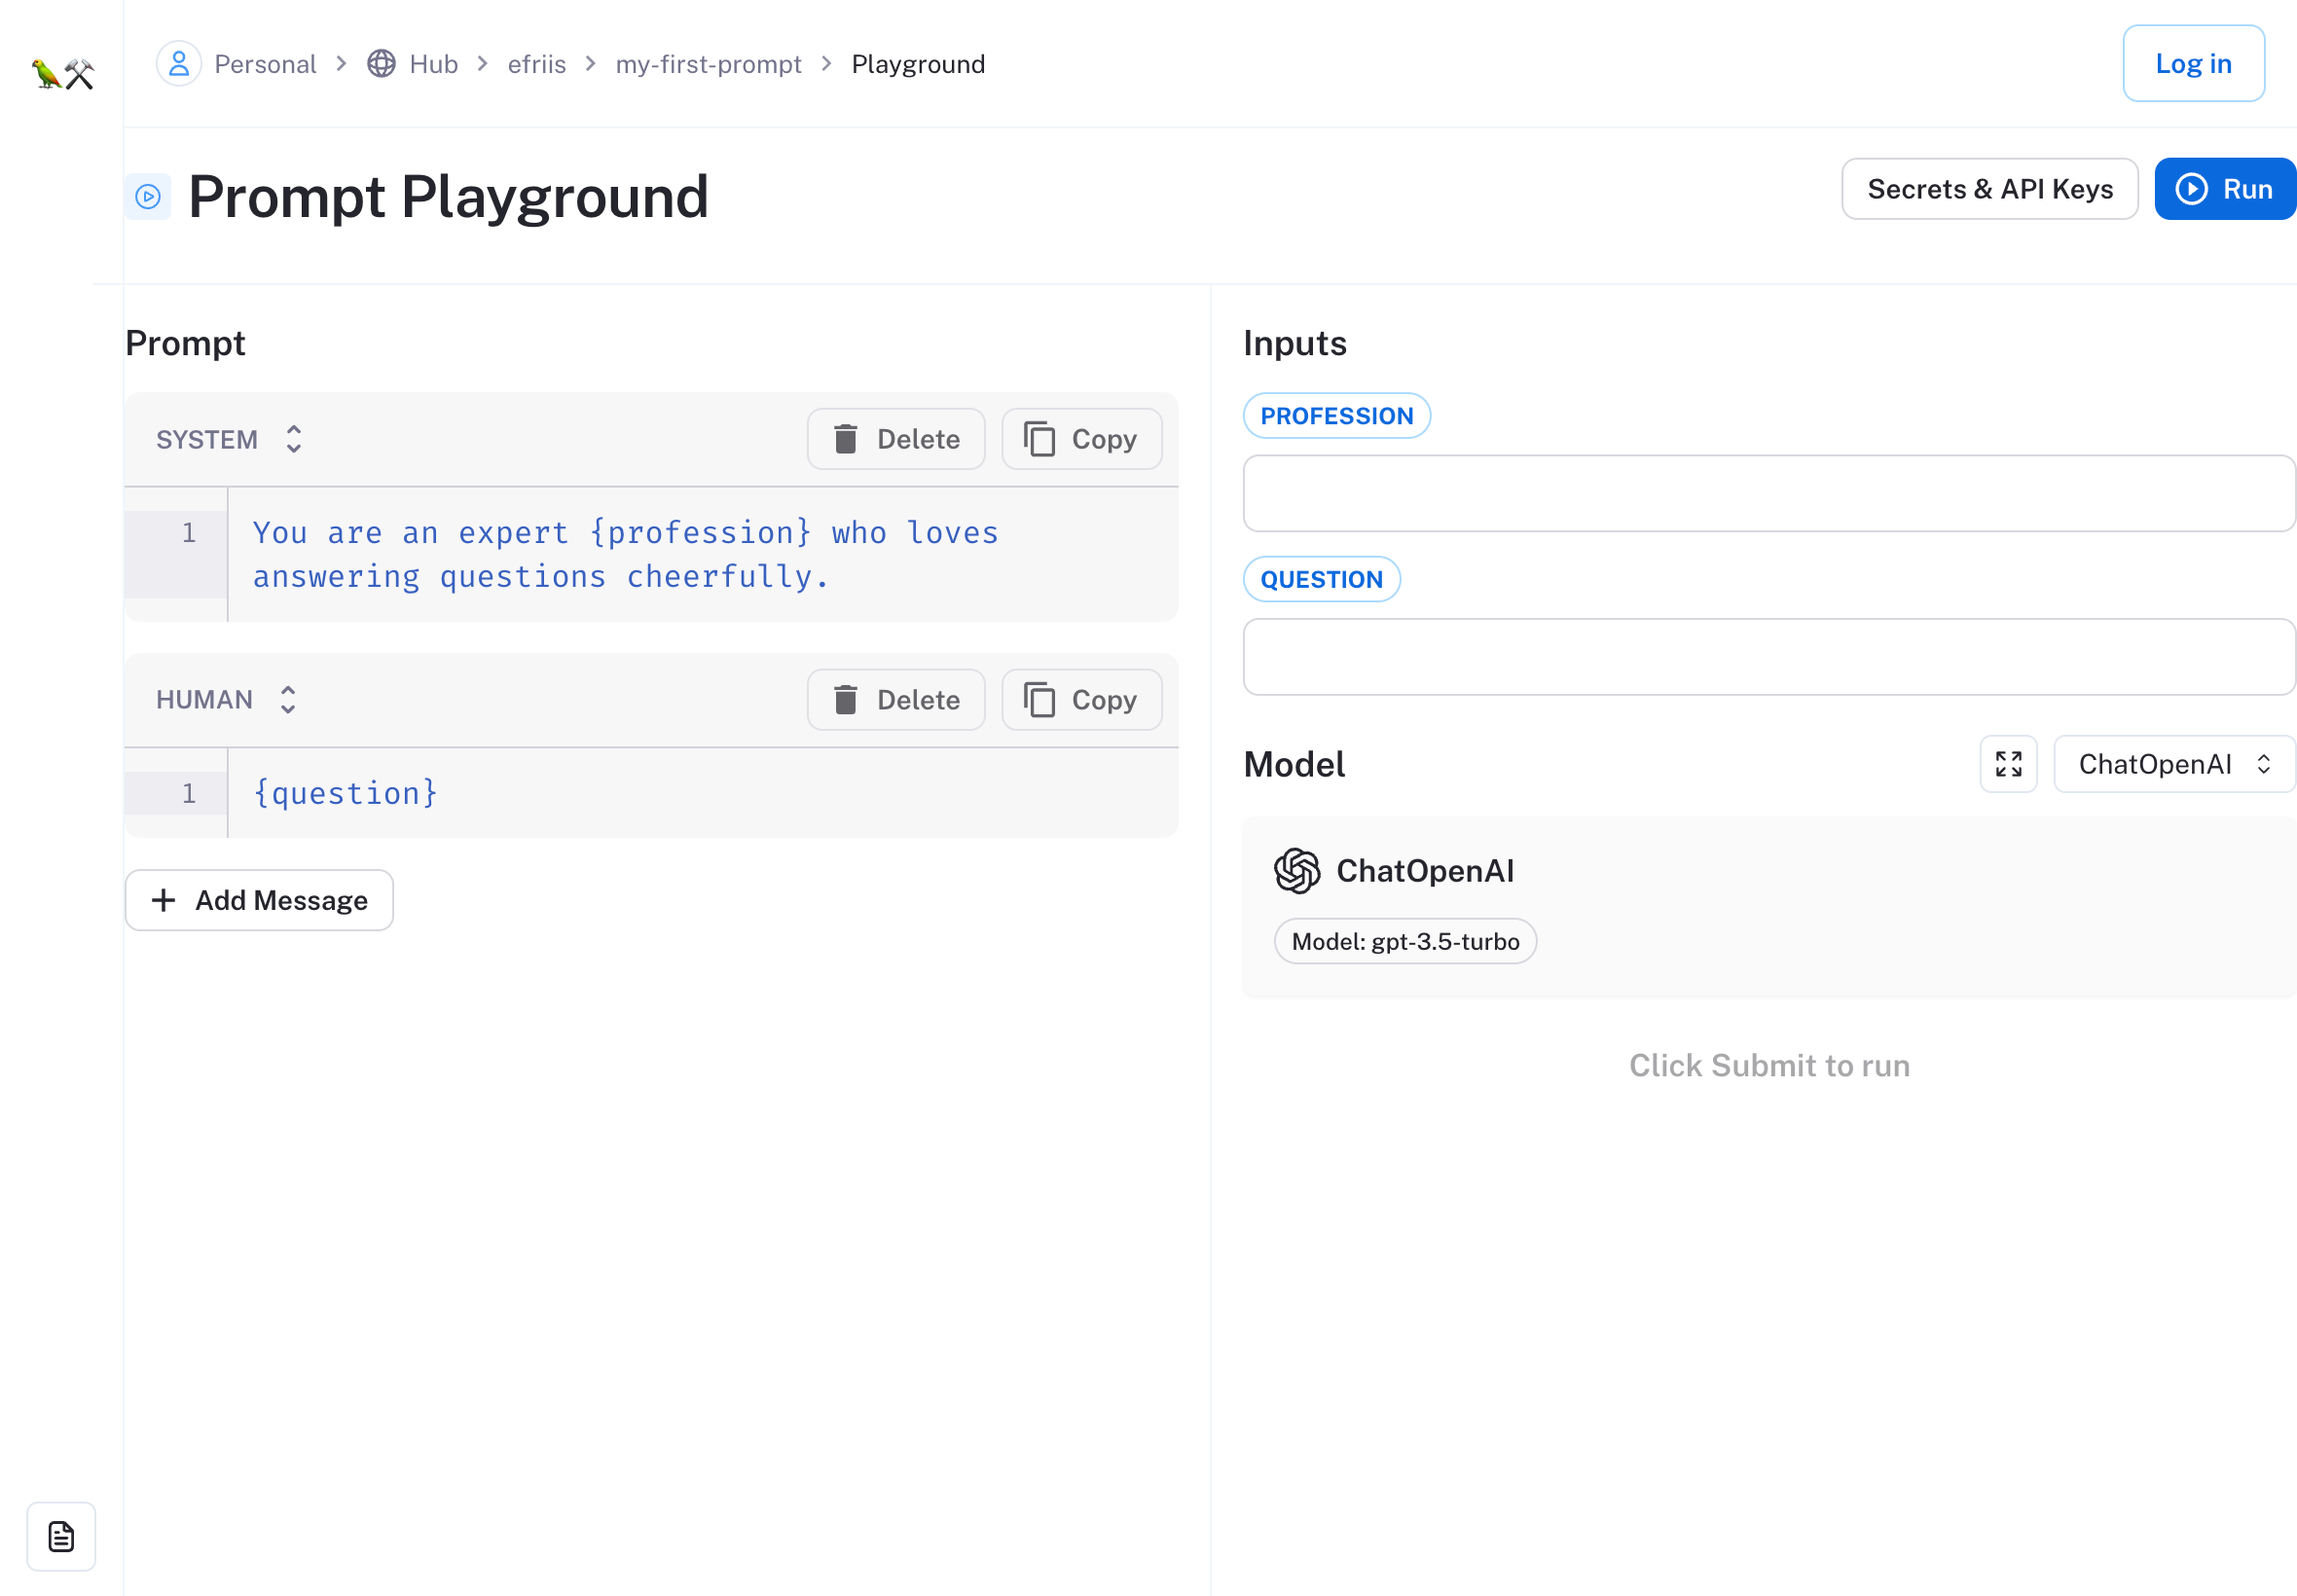
On the left, we see an editable view of our Chat Prompt.
To the right, we can configure our inputs and model, and above that, you can add API Keys for playground-supported model providers.
Let's try it out! First, fill out your OpenAI API Key in "Secrets", and fill out a profession (e.g. biologist) and question (e.g. "what is 1 fun fact about parrots?"). Now click "Run"! The output should look something like this:
3. Log in and set a handle (One-Time Setup)
You must log into an account, where the "Personal" organization is not waitlisted, in order to proceed with steps 3 and 4.
Now that we've tried out a prompt, let's log in and set a handle. This will allow us to commit changes to the prompt back to the hub under our own user!
First, let's click that "Login" button in the top-right and log in. If you find yourself on the waitlist, you can enter your access code if you have one, or hang tight! We're letting people off every week.
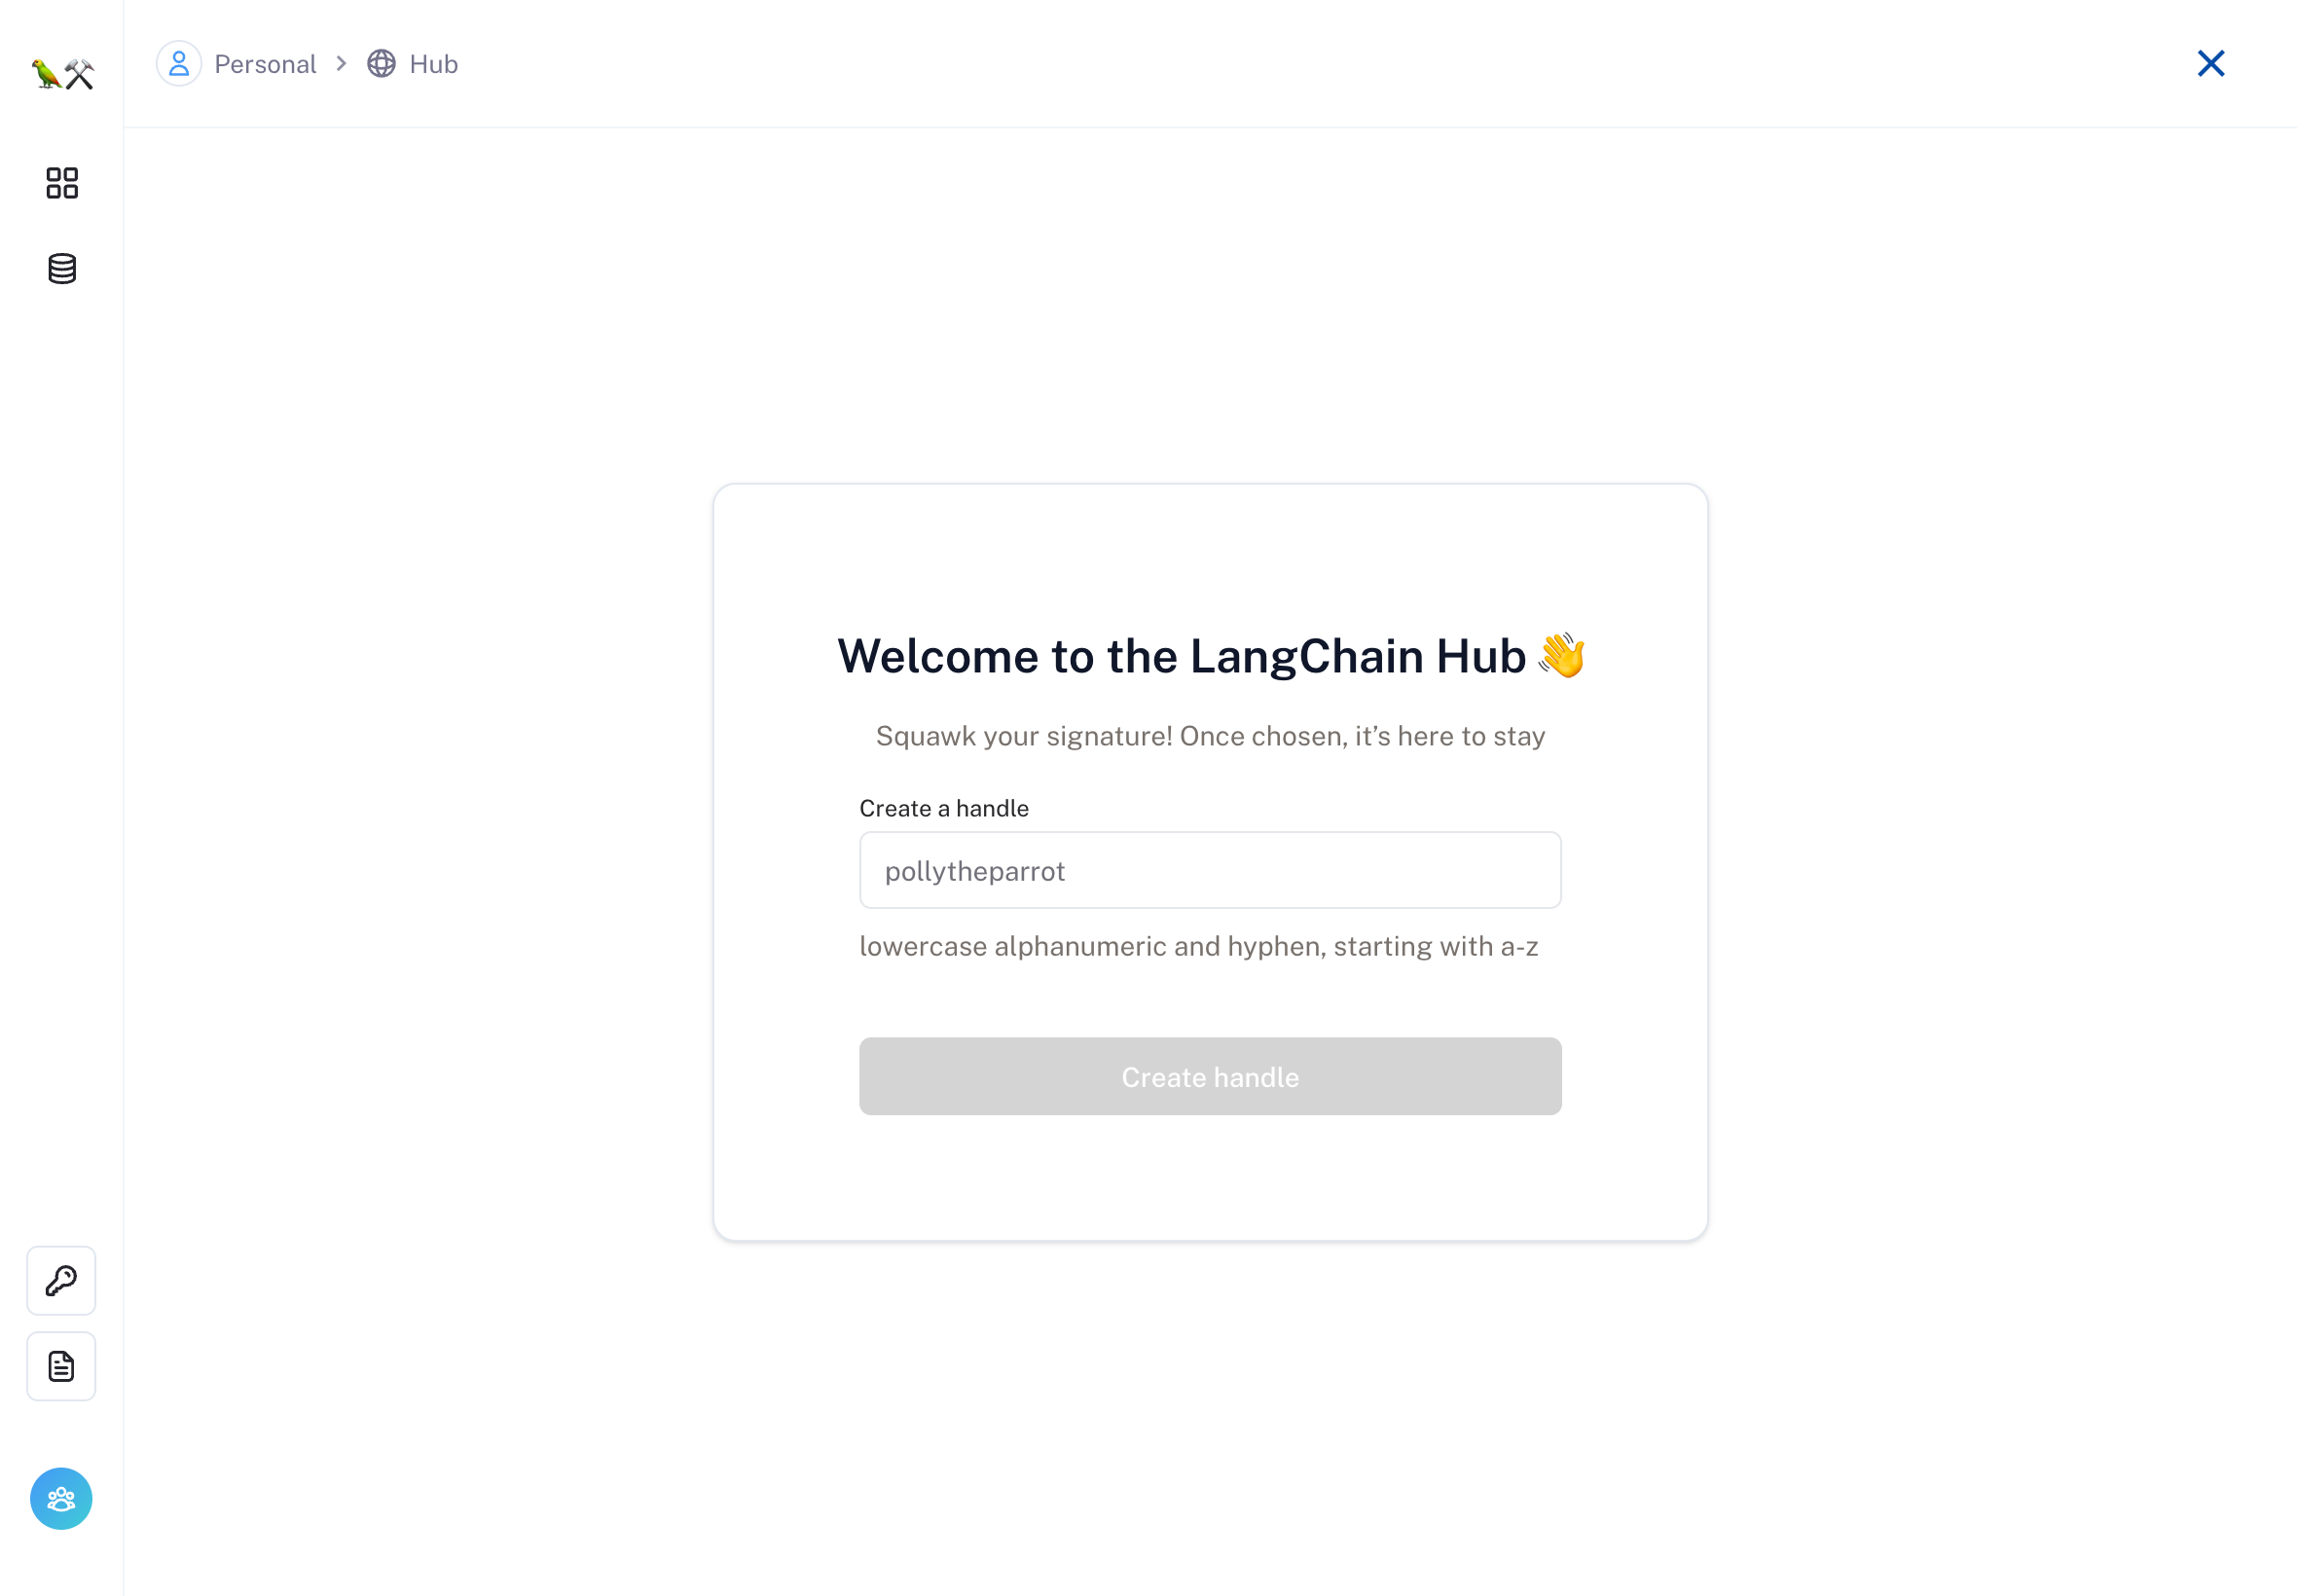
Second, go to the hub home. If you haven't set a handle yet, you'll be prompted to add one, so people can associate your prompts with you!
The handle reserves a namespace for all of your prompts, so everything you add will be saved under your-handle/prompt-name.
4. Commit to a new repo under your user
Staying on efriis/my-first-prompt's playground, let's make some changes and commit it back to a repository under your user. To start, let's modify the prompt to change the style of the response. Instead of answering "cheerfully," pick a new adverb (e.g. "angrily").
Once you've run it, we can commit it directly to a new prompt under your user. Click the "Commit" button in the top-right, and you should see a modal like this:
Note: you may have to return to the repo page and click the "Playground" button in order to see the "Commit" button.
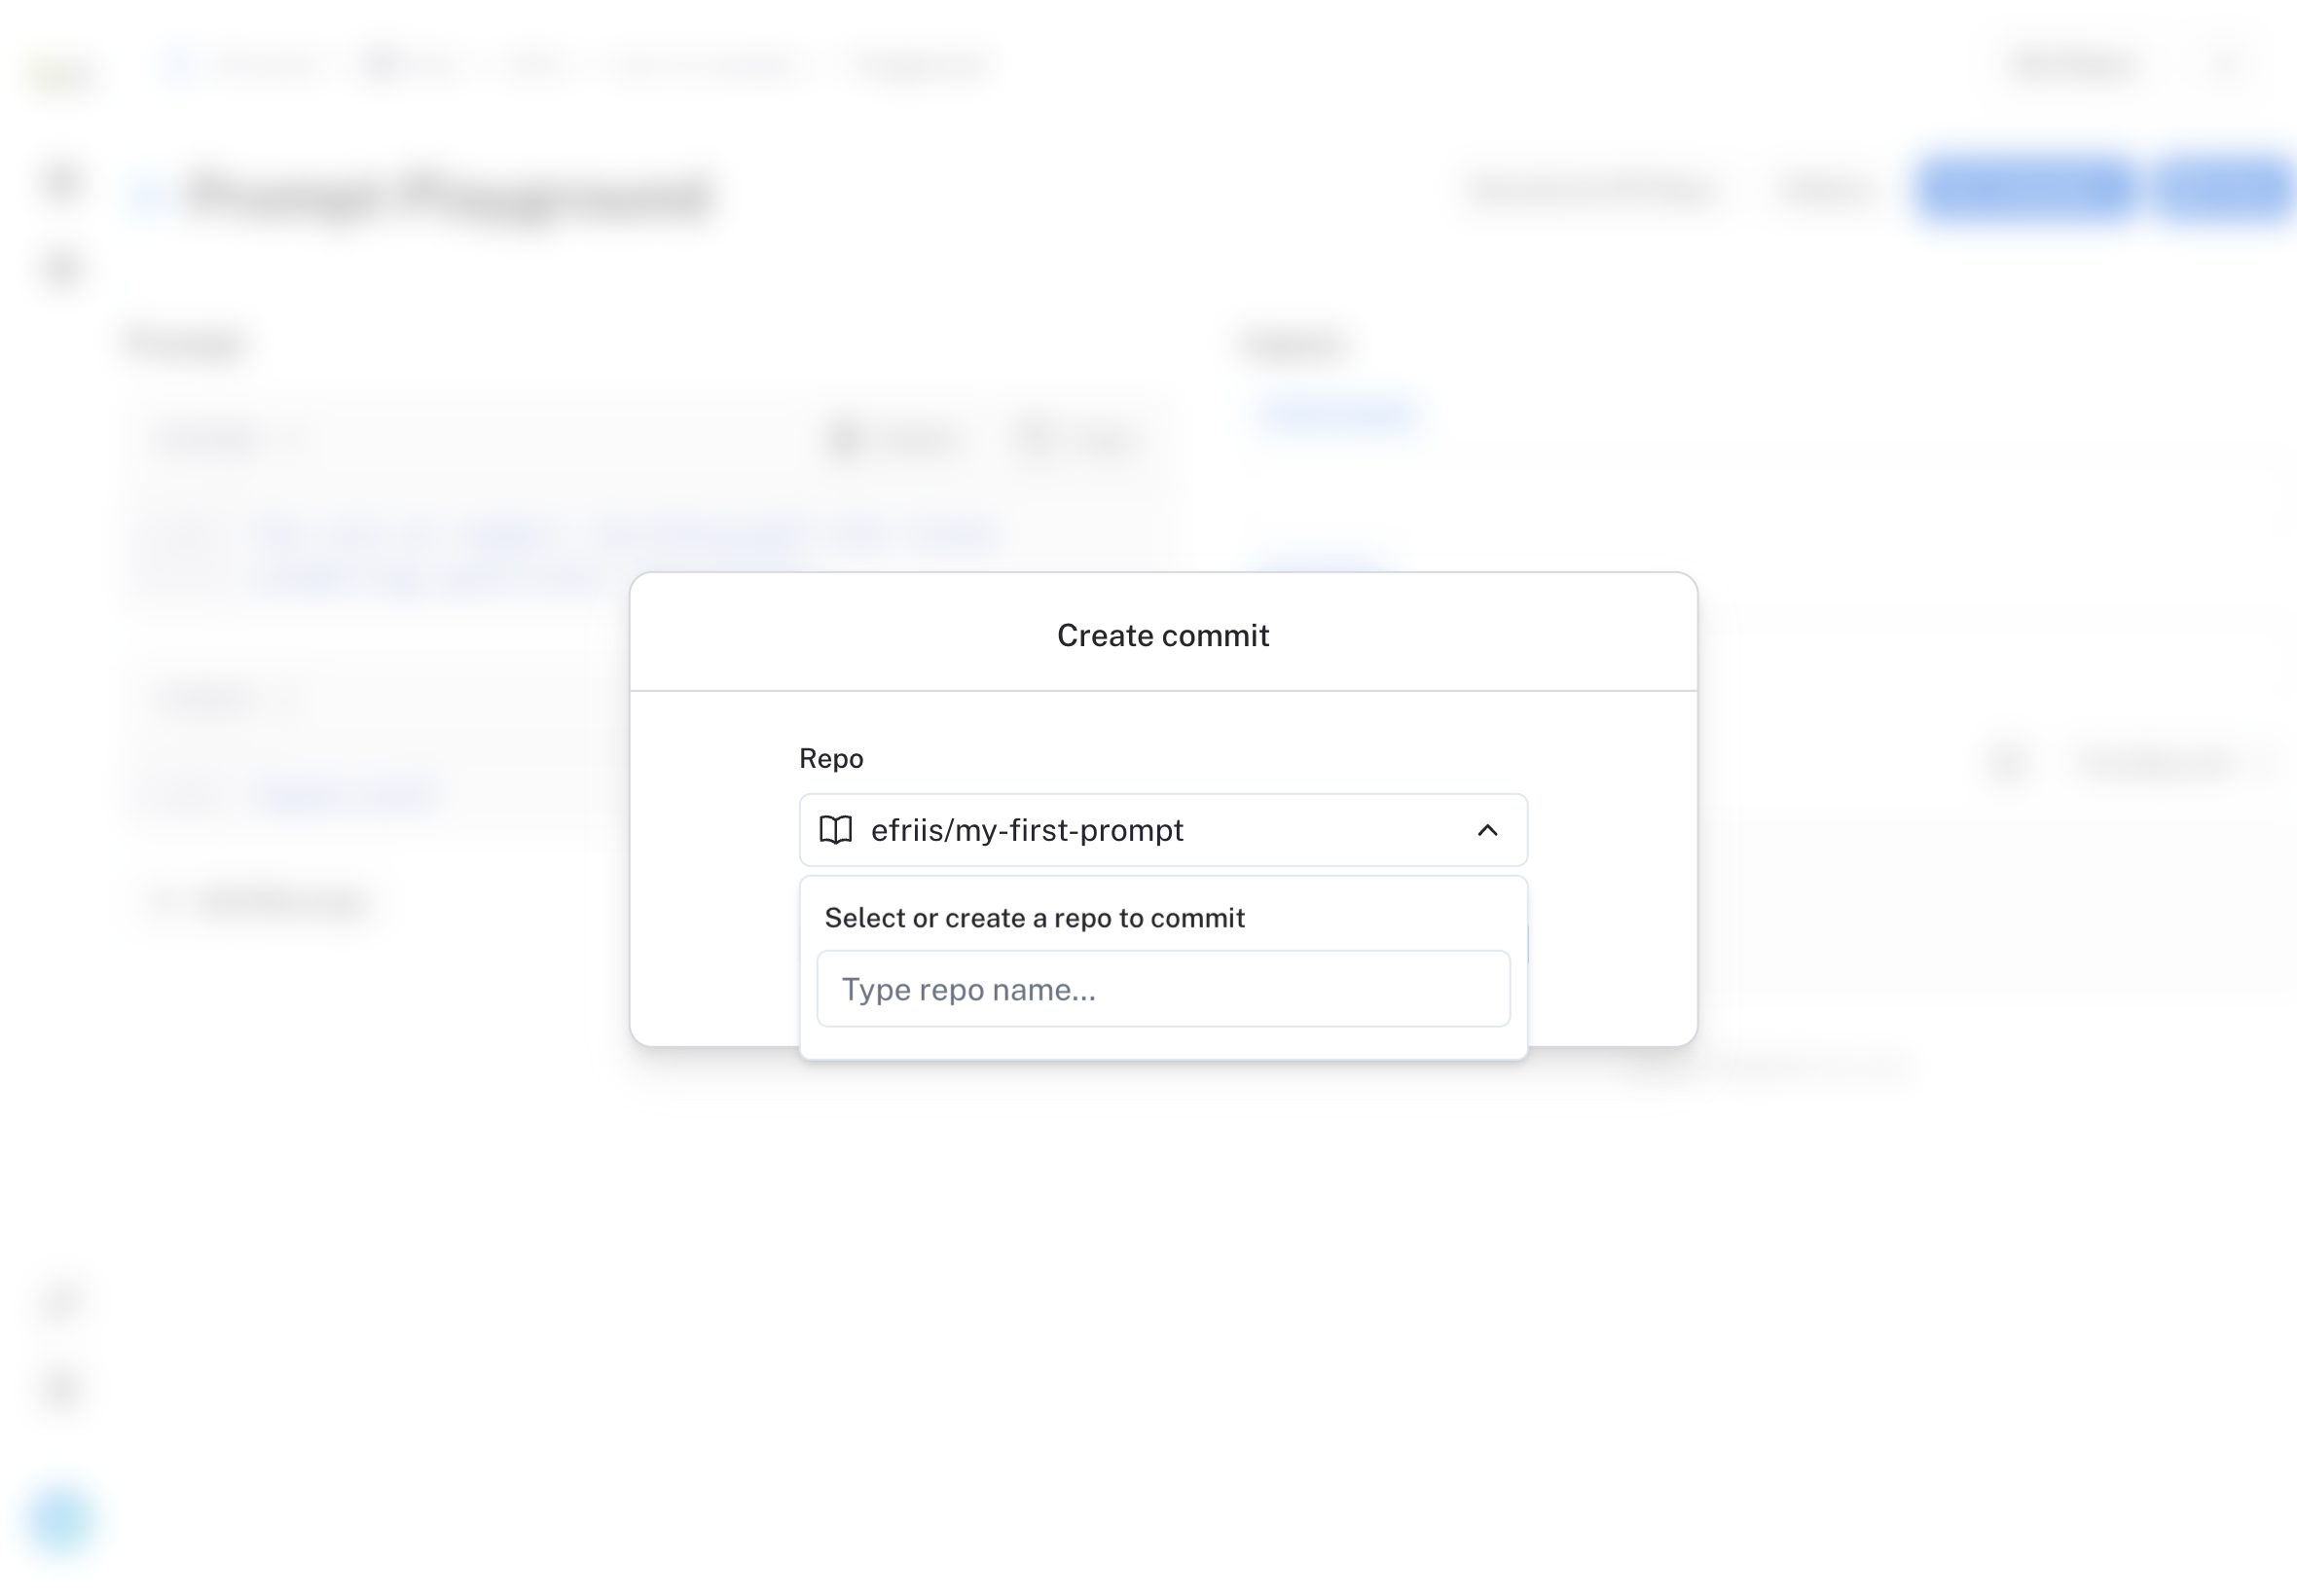
Here, you can create a new repo called my-first-prompt and use this as a first commit! Once you've done that, you'll be redirected to your new prompt.
5. Create an example for your repo
To show off potential use cases for the prompt, let's add an example to our new repo! Fill out another profession and question and click "Run" again. When the run has finished, click "Save as Example" to move it into the left panel as an example. Now commit to your repo again and click on your repo's name at the top of the screen to navigate back to your repo's home page.
There, you should see your new example! These examples are publicly shown on your repo page.
